Kodi Tutorial: External USB Hard Drive
Monday 1st October 2018 1:20am
Installing An External USB Hard Drive
It is recommended that an external USB hard drive be connected to the Raspberry Pi to act as the hub that all media content (pictures, movies, tv shows and music) are stored. But before we connect the hard drive to the Raspberry Pi we need to first connect it to a computer and rename the device to ‘My Media’. Then open the drive and create the following folders:
- Addons
- Backups
- Movies
- Music
- Pictures
- Screen Shots
- TV Shows
Alternatively you can now run PRB Install Everything EP to create the folders and set addon download paths. 🙂
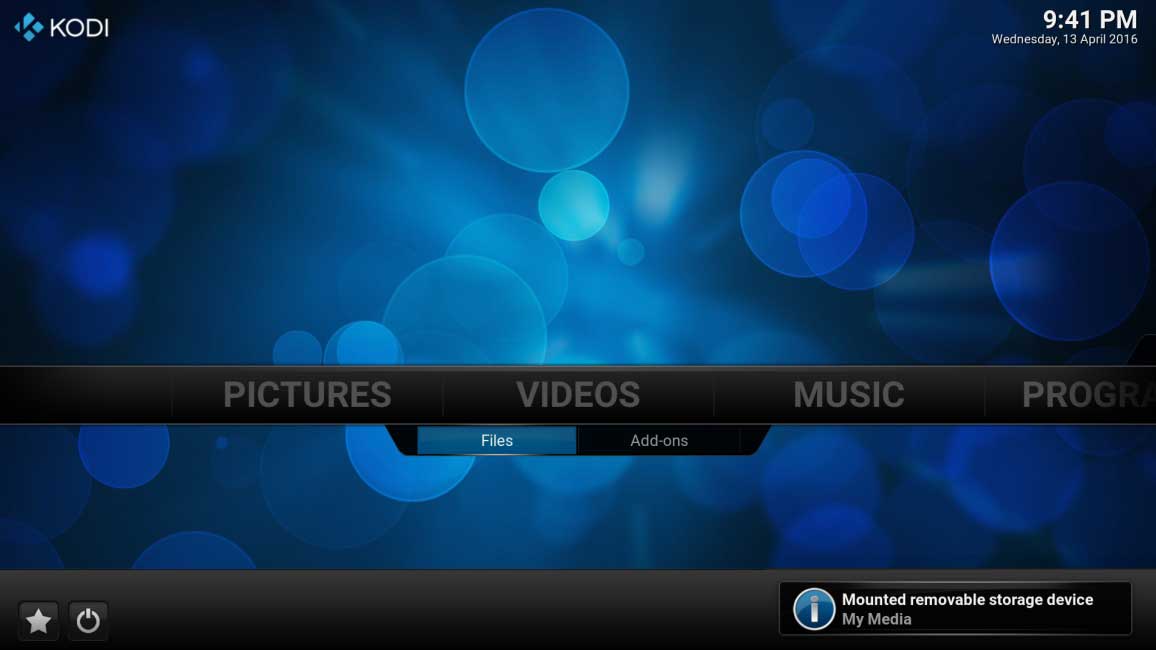
Remove the Hard Drive from the computer and plug into a spare USB socket on the Raspberry Pi. You will briefly see a message appear in the bottom right-hand corner of the screen ‘Mounted removable storage device. My Media’:
We now need to notify Kodi where the pictures, videos and music folders are located on the hard drive. This allows Kodi to create a database called the Library that catalogs what media you have and downloads the artwork and details about the movie, tv show or album. Kodi will then add menu items of the Home page so that you can search for your favourite movie or tv show by title, genre, actor etc.
Using the folders we created earlier we are going to notify Kodi where the following content it located. Click onto the following to add content: